Automatic depth map generation, stereo matching, multi-view stereo, Structure from Motion (SfM), photogrammetry, 2d to 3d conversion, etc. Check the "3D Software" tab for my free 3d software. Turn photos into paintings like impasto oil paintings, cel shaded cartoons, or watercolors. Check the "Painting Software" tab for my image-based painting software. Problems running my software? Send me your input data and I will do it for you.
Monday, November 21, 2016
3D Photos - Wish
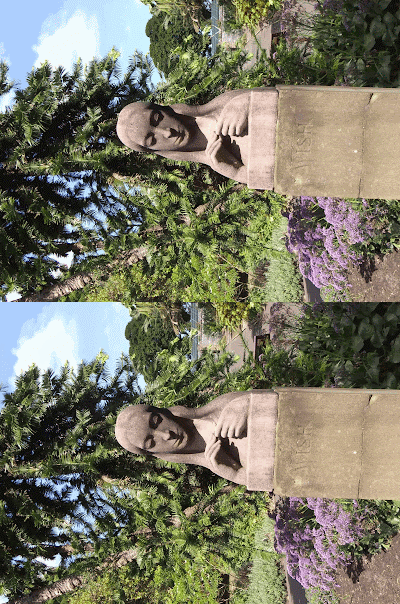
This is the initial stereo pair after a little bit of downsampling. The original image pair was 3626x2736 pixels, which I think is a bit much for what we are trying to do: Extract a depth map and create a wiggle. So, each view was downsampled by a factor of 2 in each direction and the images we are working with are actually 1813x1368 pixels, which is a much more manageable size. The original stereo pair was taken with a Fuji w3 in the upright position by mediavr. Once we have the depth map, then we will rotate everything by 90 degrees.
This is the rectified stereo pair. I used ER9b to rectify the stereo pair. It is of paramount importance to rectify/align the stereo pair prior to computing depth maps. Note that in this particular case, the original stereo pair was pretty well aligned but, in general, this is not the case. The white borders that result from the rectification process will be removed later by cropping. They really have no impact on the depth map generation process.
This is the left depth map obtained with DMAG5 using the following parameters:
image 1 = ../image_l.png
image 2 = ../image_r.png
min disparity for image 1 = -102
max disparity for image 1 = 10
disparity map for image 1 = depthmap_l.jpg
disparity map for image 2 = depthmap_r.jpg
occluded pixel map for image 1 = occmap_l.jpg
occluded pixel map for image 2 = occmap_r.jpg
radius = 16
alpha = 0.9
truncation (color) = 30
truncation (gradient) = 10
epsilon = 255^2*10^-4
disparity tolerance = 0
radius to smooth occlusions = 9
sigma_space = 9
sigma_color = 25.5
downsampling factor = 2
We are using a downsampling factor equal to 2 to speed up the depth map generation process while possibly playing around with the parameters (usually, there's no need to modify parameters except maybe the radius - the larger the images the larger the radius should be). Once we are happy with the depth map, then we set the downsampling factor to 1 and recompute the depth map (without changing any of the other parameters).
This is the left depth map obtained with DMAG5 using the following parameters:
image 1 = ../image_l.png
image 2 = ../image_r.png
min disparity for image 1 = -102
max disparity for image 1 = 10
disparity map for image 1 = depthmap_l.jpg
disparity map for image 2 = depthmap_r.jpg
occluded pixel map for image 1 = occmap_l.jpg
occluded pixel map for image 2 = occmap_r.jpg
radius = 16
alpha = 0.9
truncation (color) = 30
truncation (gradient) = 10
epsilon = 255^2*10^-4
disparity tolerance = 0
radius to smooth occlusions = 9
sigma_space = 9
sigma_color = 25.5
downsampling factor = 1
The only difference with the previously obtained depth map is the downsampling factor (now 1 instead of 2). This latter depth map is slightly better than the former.
At this point, we apply a little bit of edge preserving smoothing although it's really not that necessary.
This is the depth map obtained by EPS7, an edge preserving smoother, using the following parameters:
image to filter = ../depthmap_l.jpg
joint image = ../../image_l.png
sigma_s = 1000
sigma_r = 100
num_iterations = 3
filtered image = depthmap_eps7_l.jpg
We are about done with the grunt work. All that's left to do is rotate the left image and (left) depth map, do a little bit of cropping to get rid of the white areas (coming from rectification), and possible do a little bit of additional downsampling (we don't want the animated gif to be too big).
This is the left image and left depth map after rotation, cropping and another image reduction (image size is now 646x860 pixels).
This is the 360 wiggle created by wigglemaker, the premier 3d wiggle creator.
Subscribe to:
Post Comments (Atom)


No comments:
Post a Comment